Setting up your email signature
It is important that all employees have a consistent and professional email signature to easily identify you as an official member of this diocese. We have provided instructions below on setting up your email signature so that we can maintain a consistently branded image through our emails.
Dos and Don’ts
Do:
- Use the signature provided below
- If adding a quote, please follow our placement and formatting guidelines below
Don’t:
- Change colors or fonts
- Add other logos or change the logo
Sample email signature template
Please note that per diocesan policy, all correspondence between parishes/schools and diocesan offices must be completed using the @charlestondiocese.org email addresses. All future communications, including responses to emails, will be sent only to your @charlestondiocese.org email address.
Firstname Lastname, Title
Office of XXXXXXX

Diocese of Charleston | www.charlestondiocese.org
youremail@charlestondiocese.org | 555.555.5555
Confidentiality Notice: This e-mail message from the Diocese of Charleston, including any attachments, is for the sole use of the intended recipient (s) and may contain confidential or proprietary information. Any unauthorized review, use, disclosure or distribution is prohibited.
Setting up your signature on the Outlook web app
- Find and click the gear button at the top of your Outlook page. This will open a “settings” dropdown.

- At the bottom of the dropdown, click the link that says “View all Outlook settings”.
- Under “Mail” on the far left, select “Compose and Reply” to find where to input your email signature.
- Copy the email signature template above and paste it into the signature box. You will have to do some additional editing and formatting before this is complete.
- Change the placeholder text and replace with your name, title, office name, email address, and phone number. Please keep the same formatting for now.
- Select your email address and click the three dots for more formatting options. Click the chain link icon to add a hyperlink to your email address. In the field where it says “Web address (URL)” type in “mailto:” followed by your email address with no space between, (for example, “mailto:youremail@charlestondiocese.org”). Click ok.

- Select all text and change to a size 11. The top line with your name and title may be a size 12 if you wish, but no larger.

- Select the confidentiality notice and change color to a medium gray.

- Select the notice at the top about the @charlestondiocese.org domain and change the color to red.
- Check the boxes underneath the signature field that say “Automatically include my signature on new messages that I compose” and “Automatically include my signature on messages I forward or reply to”.
- Click save. Your finalized email signature should appear like the example below. Next time you compose an email, you should see your email signature. Congratulations!

Setting up your signature on the Outlook desktop app (PC)
- Click File > Options > Mail > Signatures.
- Create a new signature if you do not already have one set up, or select the signature you’d like to edit.
- Copy the email signature template above. In the “Edit signature” box, right click and paste with the “keep source formatting” option. You will have to do some additional editing and formatting before this is complete.
- Change the placeholder text and replace with your name, title, office name, email address, and phone number. Please keep the same formatting for now.
- Select your email address and click the icon with the globe and the chainlink to hyperlink your email address.

- On the left side of the Edit Hyperlink window, click “Email address”. Type your email address in the “Text to display” field and in the “Email address” field. The “Email address” field will automatically display your email address with “mailto:” before it. Click ok.

- Select all text and change to a size 11. The top line with your name and title may be a size 12 if you wish, but no larger.

- Select the confidentiality notice and change color to a medium gray.

- Select the notice at the top about the @charlestondiocese.org domain and change the color to red.
- Underneath where it says “Choose default signature,” set this signature as your default for your email account, new messages, and replies/forwards.
- Click ok on the signature window and again on the Outlook Options window. Your finalized email signature should appear like the example below. Next time you compose an email, you should see your email signature. Congratulations!
Setting up your signature on the Outlook desktop app (Mac)
- Click Outlook > Preferences > Email > Signatures.
- Create a new signature using the + button if you do not already have one set up, or select the signature you’d like to edit and click “Edit”.
- Copy the email signature template above and paste into the large signature field. You will have to do some additional editing and formatting before this is complete.
- Change the placeholder text and replace with your name, title, office name, email address, and phone number. Please keep the same formatting for now.
- Select your email address and click the chainlink icon to hyperlink your email address.

- Leave your email address where it says “Text to Display” and type it in a second time where it says “Email Address”. Click ok.

- Select all text and change to a size 11. The top line with your name and title may be a size 12 if you wish, but no larger.
- Select the confidentiality notice and change color to a medium gray.

- Select the notice at the top about the @charlestondiocese.org domain and change the color to red.
- Click the floppy disk icon to save. Then exit out of the window.

- Underneath where it says “Choose default signature,” set this signature as your default for your email account, new messages, and replies/forwards.
- Close out of the signature window. Your finalized email signature should appear like the example below. Next time you compose an email, you should see your email signature. Congratulations!
If image won’t display after sending
Please test your email signature after setting it up by sending yourself an email. If the logo image doesn’t display, please follow the steps below to resolve the issue.
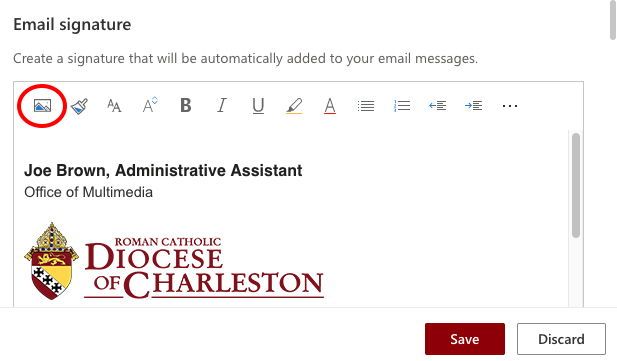
- Right click and save the image below.

- Go back to edit your email signature. Delete the logo image that’s currently there.
- In the same spot, click the image icon to add an inline image. Select the logo image you just saved to your computer.
- Click save.
If adding a quote
If adding a quote into your email signature, please follow the guidelines below to help us maintain consistency and professionalism in our branding.
- Place the quote below your email address and phone number and above the confidentiality notice.
- Quote should be enclosed in quotation marks. Quote attribution should be on the following line, preceded by a long dash.
- Format the quote in black, in size 11 or 12 italics. Format the quote attribution in size 11. Do not change the font color or add highlighting.
- See the example below for how a final signature with a quote should look.
